Table of Contents
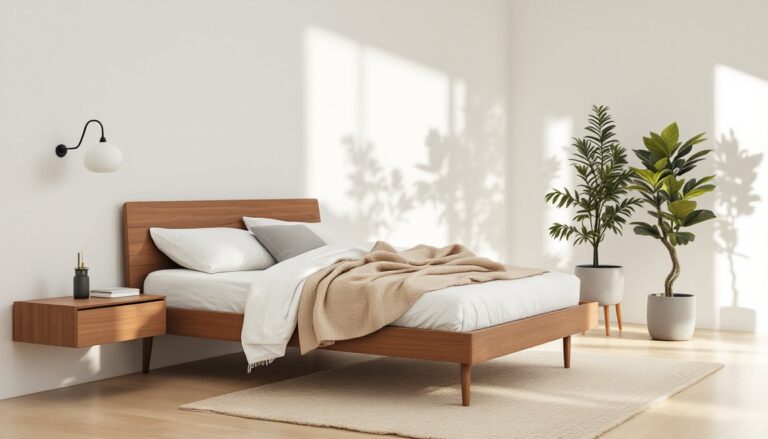
TogglePlanning a bedroom makeover without a clear vision is like framing a wall without a tape measure, you’re bound to hit surprises. 3D bedroom design software eliminates the guesswork, letting homeowners visualize layouts, furniture placement, lighting, and color schemes before committing to paint or purchases. Whether someone’s rearranging existing furniture or gutting the space down to the studs, virtual planning tools save time, money, and the frustration of discovering that king-sized bed won’t clear the door swing. In 2026, these platforms have become more accessible, accurate, and powerful than ever, turning what used to require professional drafting into a weekend project anyone can tackle from a laptop or tablet.
Key Takeaways
- 3D bedroom design software eliminates guesswork by letting homeowners visualize layouts, furniture placement, lighting, and color schemes before making purchases or permanent changes.
- Accurate spatial planning with 3D tools prevents costly mistakes like oversized furniture, blocked closet access, and poor traffic flow by using real-world measurements and product specifications.
- Popular platforms like SketchUp Free, RoomSketcher, and Planner 5D offer varying levels of functionality, with free versions suitable for basic planning and paid tiers ($10–$50/month) ideal for complex renovations requiring professional-grade outputs.
- Precise room measurements including wall lengths, ceiling height, door swing direction, and fixture locations are essential before inputting dimensions into 3D bedroom design software.
- Testing multiple furniture configurations, finishes, and lighting schemes in 3D models saves time and money by preventing impulse purchases and communication issues with contractors.
- Strategic design choices like positioning beds along the longest wall, using vertical storage, and previewing layered lighting (ambient, task, and accent) maximize both space and style in bedroom layouts.
What Is 3D Bedroom Design and Why It Matters
3D bedroom design uses digital modeling software to create a three-dimensional representation of a room. Unlike flat floor plans or sketches, these tools render walls, windows, doors, furniture, and fixtures in realistic scale and proportion. Users can navigate the space from multiple angles, adjust dimensions, swap materials, and test lighting conditions, all before moving a single piece of furniture or opening a can of primer.
This approach matters because bedrooms are highly personal spaces with limited square footage. A poor furniture layout can block closet access, create traffic bottlenecks, or leave awkward dead zones that waste usable area. Virtual design lets homeowners test multiple configurations in minutes rather than hauling a dresser back and forth across the room. It also clarifies structural constraints: ceiling height for a loft bed, clearance for a barn door, or whether that corner desk will interfere with a heating vent.
For DIYers planning renovations, adding a closet system, relocating outlets, or installing built-in shelving, 3D models help communicate scope to contractors and confirm that new elements won’t conflict with existing framing, plumbing, or electrical runs. It’s a visualization step that turns vague ideas into actionable plans, reducing costly mid-project changes.
Benefits of Using 3D Design for Your Bedroom Makeover
Accurate spatial planning tops the list. Most bedroom design mistakes stem from misjudged dimensions, furniture that’s too large, nightstands that block drawer access, or rugs that disappear under the bed frame. 3D tools use real-world measurements (inputting actual room dimensions and product specs) so users see exactly how a 60″ dresser fits against an 84″ wall, accounting for baseboards and door trim.
Cost control comes next. By previewing furniture arrangements and finishes digitally, homeowners avoid expensive returns or repainting. Testing three paint colors in virtual lighting is free: buying three sample quarts and repainting costs time and materials. The same applies to flooring, window treatments, and accent walls, seeing options in context prevents regrettable impulse buys.
Design confidence increases when decisions are visualized. It’s easier to commit to bold design techniques like an accent wall or statement headboard when the software confirms it won’t overwhelm the space. First-time DIYers especially benefit from the ability to experiment without consequences, building skills and taste before wielding a paintbrush.
Communication with pros improves dramatically. Sharing a 3D model with an electrician, carpenter, or painter ensures everyone’s on the same page. Instead of vague descriptions (“I want the sconces sort of here”), a rendered layout shows exact placement, heights, and adjacency to other elements. This reduces callbacks, change orders, and misunderstandings that blow budgets.
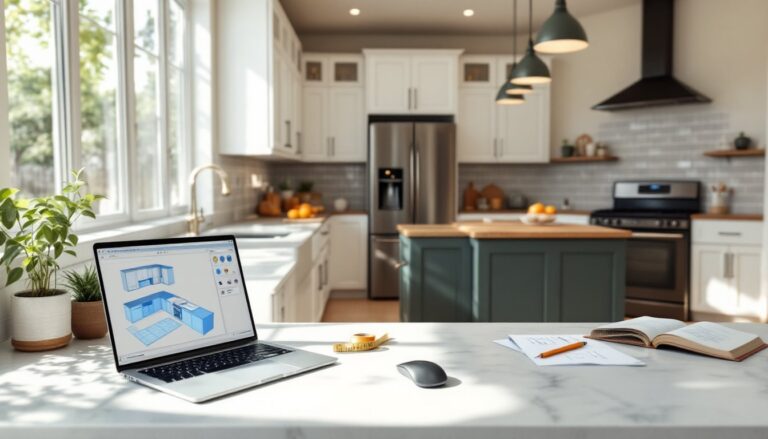
Best 3D Bedroom Design Software and Tools for Homeowners
Several platforms cater to different skill levels and project scopes. SketchUp Free offers browser-based 3D modeling with a moderate learning curve. It’s robust enough for detailed room layouts, custom built-ins, and furniture design, but requires patience to master navigation and drawing tools. SketchUp’s warehouse library includes thousands of furniture models, though dimensions must be verified.
RoomSketcher balances ease of use with functionality. Users draw floor plans in 2D, then switch to 3D walkthroughs. It includes furniture libraries, finish options, and snapshot tools for sharing designs. The free version limits exports and high-resolution images: paid tiers unlock full features. It’s ideal for homeowners who want polished visuals without steep learning.
Planner 5D provides drag-and-drop simplicity with extensive catalogs of furniture, decor, and materials. Its AI-assisted design suggestions help users stuck on layout options. The free version watermarks images: subscriptions remove limits and add premium content. This platform suits quick mockups and exploring style trends without technical friction.
For inspiration and product sourcing, platforms like Houzz combine ideabooks with 3D visualization features, allowing users to test actual products from retailers in virtual rooms. Similarly, Homify offers galleries of completed projects alongside planning tools, helping homeowners translate inspiration into actionable designs.
Free vs. Paid Design Platforms
Free tools typically limit exports, resolution, or catalog access but suffice for basic planning, testing furniture placement, measuring clearances, and visualizing paint colors. They’re perfect for simple makeovers: rearranging existing furniture, choosing a new bed frame, or planning a gallery wall.
Paid platforms ($10–$50/month) unlock higher-resolution renderings, expanded libraries, and advanced features like lighting simulation, custom materials, and contractor-ready floor plans. They’re worth the investment for whole-room renovations involving new flooring, built-ins, or layout changes that require precise documentation. Some offer one-time project pricing, which works for single-room overhauls without ongoing subscriptions.
Homeowners should start with free versions to gauge whether the interface fits their workflow, then upgrade if the project demands professional-grade outputs or collaboration features.
Step-by-Step Guide to Creating Your 3D Bedroom Layout
1. Measure the room accurately. Use a 25′ tape measure to record wall lengths, ceiling height, door and window dimensions, and locations of outlets, switches, vents, and light fixtures. Note door swing direction and any obstructions like radiators or sloped ceilings. Measure from corner to corner and record distances to trim and baseboards, most software defaults to finished dimensions, not rough framing.
2. Input dimensions into the software. Start by drawing the room perimeter using the platform’s wall tool. Enter exact measurements rather than eyeballing: precision here prevents later frustration. Add windows and doors, specifying heights and casing widths. Mark fixed elements like closets, built-ins, or floor registers.
3. Place furniture to scale. Use the software’s library or input custom dimensions from product specs. Remember that a queen mattress measures 60″ × 80″, but the bed frame adds 2–4″ per side. Nightstands typically stand 24–28″ tall: ensure they align with mattress height (usually 24–26″ from the floor including frame and mattress). Leave 36″ minimum clearance around the bed for making it and moving comfortably, this is a standard ergonomic guideline, not just preference.
4. Test traffic flow and clearances. Walk through the virtual layout. Can dresser drawers open fully without hitting the bed? Does the closet door clear the nightstand? Is there at least 30″ of clearance in front of the closet for dressing? These details prevent real-world headaches. Adjust until movement feels natural.
5. Experiment with finishes and lighting. Apply paint colors, flooring options, and window treatments to see how they interact. Toggle between daytime and nighttime lighting if the software supports it. Test multiple schemes, warm neutrals vs. bold accent walls, hardwood vs. carpet. Many platforms include current trends in their material libraries, making it easy to preview popular looks.
6. Generate views and measurements. Capture screenshots or export floor plans showing furniture placement and dimensions. These become reference documents during shopping and installation. If hiring help, share the file directly, many contractors appreciate SketchUp or PDF floor plans over hand-drawn sketches.
Design Tips to Maximize Space and Style in 3D
Prioritize circulation first. In bedrooms under 120 sq ft, every inch counts. Position the bed against the longest wall to maximize floor space. Avoid centering it on a wall with a window unless there’s adequate clearance on both sides, cramped walkways make the room feel smaller, even if the 3D render looks balanced.
Use vertical space. Tall dressers, floating shelves, and wall-mounted lighting free up floor area. In the 3D model, test upper cabinets or shelving above the headboard, but confirm ceiling height allows for comfortable sitting up in bed, 48″ minimum clearance is standard for adult headroom.
Leverage symmetry for visual calm. Matching nightstands and lamps on either side of the bed create balance, which most 3D tools emphasize naturally. This isn’t rigid, asymmetry works in larger rooms or when mixing furniture styles, but symmetry simplifies small-space design.
Account for real-world quirks. Radiators, sloped ceilings, and off-center windows disrupt idealized layouts. In the 3D model, mark these constraints with notes or color-coded zones. For example, if a baseboard heater runs along one wall, leave 6″ clearance for airflow, blocking it with furniture is a fire hazard and kills efficiency.
Preview layered lighting. Bedrooms need ambient (overhead or recessed), task (reading lamps or sconces), and accent (picture lights or LED strips) lighting. Place fixtures in the 3D model to check coverage and avoid dark corners. Sconces should sit 60–66″ above the floor (roughly eye level when seated) to minimize glare.
Simulate storage needs. Add closet organizers, under-bed storage, or wardrobes to the model. A king bed with drawers adds 12–14″ to the footprint, test whether that fits before buying. If the closet’s shallow, external storage like an armoire might be necessary: the 3D layout reveals whether the room can accommodate it.
For more inspiration on pairing colors and textures, browsing curated galleries on Decoist alongside 3D modeling helps refine aesthetic choices before finalizing plans.
Conclusion
3D bedroom design shifts planning from guesswork to precision. It’s not about creating showroom perfection, it’s about making confident, informed decisions that prevent expensive mistakes. Whether someone’s rearranging furniture or planning a full renovation, virtual tools turn abstract ideas into measurable, testable layouts that work in real space.