
Table of Contents
ToggleBathroom flooring gets more abuse than almost any surface in your home, standing water, humidity swings, dropped shampoo bottles, and constant foot traffic. The right tile design doesn’t just look good: it handles all that punishment while tying together your fixtures, wall color, and overall style. Whether you’re renovating a cramped powder room or laying out a primary suite, understanding tile patterns, materials, and sizing will save you from costly mistakes and buyer’s remorse. This guide walks through proven design strategies that balance aesthetics, durability, and real-world installation challenges.
Key Takeaways
- Bathroom floor tiles must meet PEI 3 or higher wear-resistance ratings and have water absorption below 0.5% to withstand moisture, foot traffic, and temperature fluctuations.
- Porcelain dominates bathroom flooring due to its superior durability and stain resistance, while patterned layouts like herringbone and chevron add visual impact but increase installation costs by 30–50%.
- Large-format bathroom floor tile designs (12×24-inch or larger) make small spaces feel bigger by reducing grout lines and simplifying maintenance.
- Straight-lay patterns minimize material waste at 10%, while diagonal layouts waste 15–20%, making pattern selection critical for budget planning.
- Light-colored bathroom floor tiles with large-format layouts are ideal for small spaces under 50 square feet, while larger bathrooms can showcase bold accent tiles, herringbone patterns, or heated radiant floors.
- Proper substrate preparation, waterproofing, and accurate layout planning determine long-term success more than tile brand, so order 10–20% extra material and use sealed or epoxy grout with patterned designs.
Why Choosing the Right Bathroom Floor Tile Matters
Bathrooms demand tiles engineered for moisture and slip resistance. A tile rated for porosity and coefficient of friction (COF) will outlast purely decorative options by years. Porcelain and ceramic tiles carry PEI ratings (Porcelain Enamel Institute scale) that indicate wear resistance, PEI 3 or higher suits residential bathroom floors.
The wrong choice shows up fast: cracked grout lines from flexible substrates, mildew creeping through porous stone, or a slick surface that turns your shower exit into a skating rink. Bathrooms also see temperature shifts, so tiles with low water absorption (under 0.5% for porcelain) resist freeze-thaw damage in unheated spaces.
Beyond performance, tile sets the visual tone. Large-format tiles make small bathrooms feel bigger by reducing grout lines. Bold geometric patterns create a focal point that lets you keep walls neutral. Choosing tile upfront influences everything downstream, underlayment thickness, door clearances, transition strips, so it’s not a detail to rush.
Popular Bathroom Floor Tile Patterns and Layouts
Pattern choice affects material waste, labor cost, and perceived room dimensions. Straight-lay (grid) is the most economical: minimal cuts, faster installation, and predictable material usage. Expect about 10% overage for cuts and breakage.
Offset or running bond (sometimes called brick-lay) staggers tiles by 50%, hiding minor substrate imperfections and adding visual interest without complexity. It works especially well with 12×24-inch planks mimicking wood grain.
Diagonal layouts expand narrow bathrooms visually by drawing the eye along angled grout lines, but they spike waste to 15–20% because every border tile needs angled cuts. You’ll also need a wet saw with a reliable fence: a snap cutter won’t handle the volume of miter cuts cleanly.
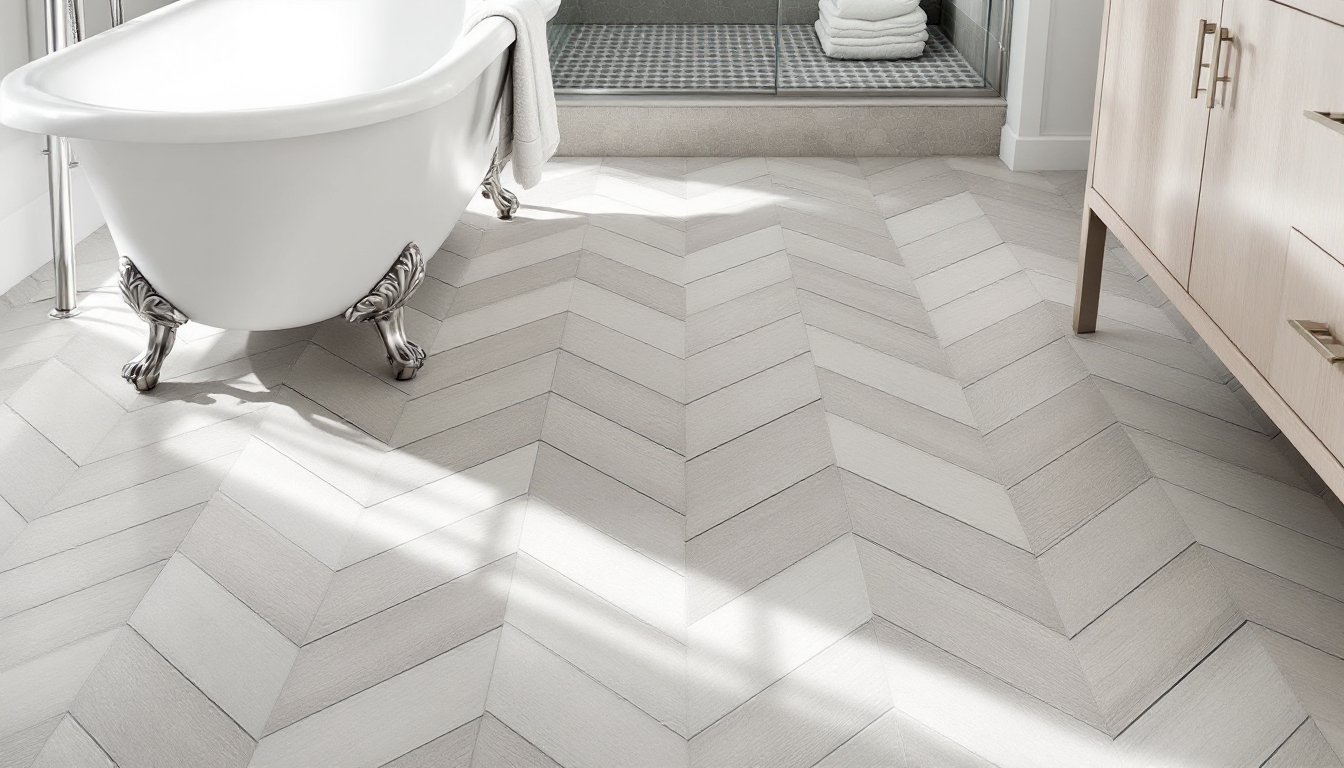
Herringbone and Chevron Patterns
Herringbone arranges rectangular tiles in a staggered zigzag, each tile’s end meeting the next tile’s side at a 90-degree angle. Chevron cuts tile ends at matching angles (typically 45 degrees) so the zigzag forms continuous V-shapes. Both patterns deliver high-end visual impact, but they’re labor-intensive, expect installation costs to jump 30–50% over straight-lay.
Herringbone suits 3×12-inch or 4×12-inch subway tiles: smaller formats make the pattern too busy underfoot. Chevron demands precision cuts, so hiring a pro makes sense unless you’re comfortable with a miter saw and have cut ceramic or porcelain before. Grout lines multiply with these patterns, so sealed grout or epoxy grout becomes worth the upcharge to prevent staining. For deeper guidance on tile varieties, explore resources that compare materials and finishes side by side.
Best Tile Materials for Bathroom Floors
Porcelain dominates bathroom floors for good reason: water absorption below 0.5%, Class 5 PEI hardness ratings, and availability in endless finishes, matte, polished, textured, wood-look, stone-look. Glazed porcelain resists stains without sealing. Through-body porcelain hides chips because color runs throughout the tile. Budget around $3–$12 per square foot for quality porcelain, depending on size and finish.
Ceramic costs less, $1–$5 per square foot, but absorbs more water (3–7%), making it better for powder rooms than wet areas. Ceramic works fine over properly waterproofed substrates, but avoid it in doorless showers or if your subfloor sees any flex.
Natural stone (marble, slate, travertine) brings unique veining and texture. Marble is elegant but porous: it requires annual sealing and etches from acidic cleaners. Slate offers great slip resistance with cleft (rough) finishes but varies in thickness, complicating installation. Stone generally runs $5–$20 per square foot, not counting sealing and specialized cutting tools.
Luxury vinyl tile (LVT) isn’t true tile, but it mimics ceramic and wood at $2–$7 per square foot with faster DIY installation, click-lock or peel-and-stick. LVT is 100% waterproof and softer underfoot, though it lacks the longevity and resale cachet of porcelain. It also expands and contracts with temperature, so leaving perimeter gaps is critical.
Cement and encaustic tiles deliver bold patterns and artisan appeal. They’re porous, so sealing is mandatory, and costs start around $8–$25 per square foot. Installation demands careful leveling because handmade tiles vary in thickness.
Color Schemes and Size Considerations for Maximum Impact
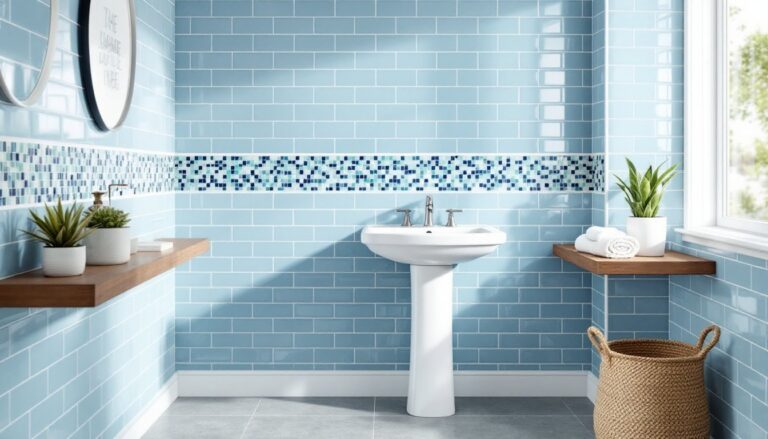
Light colors, whites, soft grays, beiges, reflect available light and make tight bathrooms feel airier. Light grout can show stains, so consider mid-gray grout to balance brightness with practicality. Darker tiles (charcoal, navy, black) hide water spots and soap scum but emphasize dust and reveal every stray hair: they’re best in larger bathrooms with ample natural light.
Bold accent tiles, geometric mosaics, patterned cement tiles, work as borders or defined zones (shower floor, under the vanity) without overwhelming the space. Pair them with neutral field tiles to keep the design cohesive and avoid visual chaos.
Tile size has functional and aesthetic consequences. 12×24-inch or larger planks reduce grout line density, speeding installation and simplifying cleaning. Large-format tiles (24×24-inch or 24×48-inch) suit spacious bathrooms but demand perfectly flat substrates, any dip or hump causes lippage (edges that don’t align). Plan to use large-notch trowels (1/2-inch × 1/2-inch) and back-butter tiles to ensure full adhesive coverage.
Small mosaics (1×1-inch or 2×2-inch) excel on shower floors where their grout lines add slip resistance. They’re sheet-mounted for easier handling but take longer to install and grout. Match mosaic color to field tile or use a contrasting shade to define the wet zone.
Remember that nominal sizing differs from actual. A “12×12” porcelain tile often measures 11-7/8 × 11-7/8 inches to account for grout joints, so always verify actual dimensions before calculating layout. When exploring creative interior design options, reviewing bathroom galleries can spark ideas for color pairing and material mixes.
Design Tips for Small vs. Large Bathrooms
Small bathrooms (under 50 square feet) benefit from light-colored, large-format tiles with minimal grout lines. A 12×24-inch plank laid parallel to the longest wall stretches the space visually. Avoid busy patterns: a single accent stripe or mosaic border is enough. Keep grout lines tight, 1/8-inch unsanded grout for rectified (precisely cut) tiles, so the floor reads as a continuous plane.
Diagonal layouts can work if the bathroom is narrow, but be prepared for fiddly cuts around the toilet flange and vanity base. Wall-to-wall tile (no transition strips mid-room) also enhances the sense of space, though you’ll need transition strips at doorways to adjacent rooms.
Large bathrooms (100+ square feet) can handle bold patterns, mixed materials, and defined zones. A herringbone or chevron layout in the main floor area, paired with hexagonal or penny-round mosaics in the shower, creates visual hierarchy without clutter. Darker tiles or high-contrast grout (charcoal tile with white grout) add drama without making the space feel cramped.
In large spaces, consider a decorative border or medallion inset, these pre-assembled designs drop into the field tile and break up expanses of uniform color. They do require advance layout planning: you’ll want the feature centered on a sightline (entry door or freestanding tub) rather than hidden behind the door swing.
Heated floors (electric radiant mats) are easier to retrofit during tile work. The mat sits in thinset below the tile, adding about 1/4-inch to floor height. They’re a luxury worth considering in larger bathrooms where comfort matters and energy cost is manageable. Check local codes: some jurisdictions require GFCI protection for bathroom floor heating. If you’re gathering ideas for spatial planning, browsing professional design portfolios offers before-and-after examples that show how tile choices reshape room proportions.
Conclusion
Bathroom floor tile design balances water resistance, slip safety, aesthetic impact, and installation complexity. Porcelain remains the workhorse for most residential bathrooms, while pattern and size choices let homeowners tailor the look to their space and skill level. Prep work, flat substrates, proper waterproofing, accurate layout, determines long-term success more than tile brand. Invest time in planning, order 10–20% extra material, and don’t skip safety gear when cutting tile. The result is a durable, stylish floor that handles daily use and adds real value to your home.