
Table of Contents
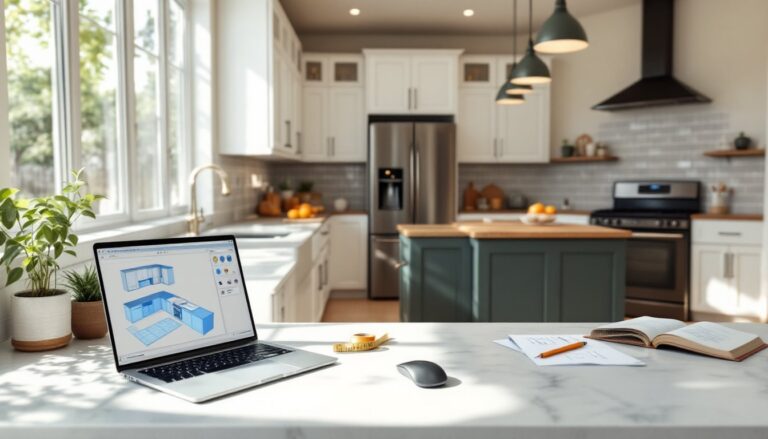
TogglePlanning a kitchen remodel used to mean hours with a designer, paper sketches, and a lot of guesswork. Not anymore. Today’s online design tools let homeowners visualize layouts, test finishes, and work out workflow problems before spending a dime on materials. Whether you’re tackling a full gut renovation or just swapping cabinets, digital planning catches measurement errors, identifies clearance issues, and helps you communicate exactly what you want to contractors or suppliers. This guide walks through the tools, the process, and the pitfalls to avoid when designing a kitchen online.
Key Takeaways
- Design a kitchen online to visualize layouts, test finishes, and catch measurement errors before spending money on materials—saving thousands in costly returns and change orders.
- Most online kitchen design tools use actual product dimensions from major manufacturers, helping you identify clearance issues and workflow problems with precise real-time visualization.
- Free tools like IKEA Kitchen Planner and HomeByMe work well for basic layouts, while paid options like SketchUp Pro and Chief Architect offer contractor-grade documentation and detailed cabinetry specifications.
- Accurate measurements are foundational—always verify room dimensions diagonally, record appliance cutout requirements from manufacturer spec sheets, and document plumbing and electrical locations before designing.
- Follow the classic work triangle principle (sink, range, refrigerator totaling 12–26 feet) and position the sink first since it’s tied to existing plumbing, then place dishwashers within 36 inches of the sink to minimize costs.
- Print your floor plan at scale and physically tape it on your actual floor to test workflow before finalizing—this catches software oversights like simultaneous appliance door openings and landing space issues that matter in real kitchens.
Why Designing Your Kitchen Online Is a Game-Changer
Online kitchen design tools eliminate the trial-and-error that used to cost homeowners thousands in material returns and contractor change orders. The biggest advantage? Real-time visualization. You can swap cabinet colors, shift appliances, and test three different backsplashes in minutes, not days.
Most platforms use actual product dimensions from major manufacturers. That means when you drop in a 36-inch refrigerator, it’s scaled correctly, and you’ll see immediately if it blocks your door swing or crowds the work triangle. This level of precision helps avoid common layout mistakes like insufficient landing space next to the range or a dishwasher that can’t open fully when chairs are pulled out.
Cost transparency is another win. Many tools pull pricing data as you build, so you know if that waterfall-edge quartz island is blowing your budget before you order samples. And if you’re doing the work yourself, having a detailed digital plan with measurements makes ordering materials straightforward, you’ll know exactly how many linear feet of base cabinets you need, what size sink fits your layout, and whether standard countertop depth works or if you need custom fabrication.
Finally, digital plans are easy to share. Email your design to contractors for accurate bids, show it to your spouse without arguing over sketches, or use it to pull permits if your jurisdiction requires drawings for kitchen remodels. Many municipalities now accept digital plans for non-structural work, though always check local requirements.
Best Free and Paid Kitchen Design Tools Available Today
Choosing the right platform depends on how deep you want to go. If you just need a layout and basic visualization, free tools work fine. For photorealistic renders and detailed material specs, paid software delivers.
Free options:
• IKEA Kitchen Planner – Best for IKEA cabinet systems. Drag-and-drop interface, auto-generates shopping lists with product codes. Limited to IKEA inventory, but great if you’re planning a budget-friendly remodel.
• HomeByMe – Browser-based, no download required. Offers 2D and 3D views, decent material library. Export quality is lower than paid tools, but it’s solid for preliminary planning.
• RoomSketcher – Free tier allows basic floor plans and simple 3D views. Good for layout experimentation. Paid upgrade unlocks higher-res images and additional features.
Platforms like Houzz offer extensive photo galleries and professional designer connections, making them useful for gathering ideas before you start the actual design process.
Paid tools:
• SketchUp Pro – $299/year. Industry-standard modeling software. Steep learning curve, but unmatched flexibility. Supports custom dimensions, extensions for cabinetry, and can export to CAD formats if your contractor needs them.
• Chief Architect – $2,995+ one-time purchase. Professional-grade, used by contractors and designers. Includes building code checks, electrical planning, and structural elements. Overkill for most DIYers, but if you’re managing a whole-house remodel, it’s worth considering.
• 2020 Design – Subscription-based, pricing varies. Popular with kitchen and bath dealers. Massive product catalog with real manufacturer SKUs. Often bundled with cabinetry purchases from participating retailers.
For most homeowners, free tools handle layout and visualization just fine. Upgrade to paid software if you need contractor-level documentation, custom cabinetry plans, or integration with ordering systems.
Step-by-Step: How to Design Your Kitchen Online
Jumping straight into cabinet selection is tempting, but you’ll waste time if your measurements are off or your layout doesn’t work. Follow this sequence.
Measure Your Space Accurately
Grab a 25-foot tape measure, notepad, and a helper if possible. Measure wall-to-wall dimensions at floor level, not baseboard to baseboard, baseboards add thickness. Record:
• Total wall lengths for each wall
• Window and door locations (measure from corners to the edge of trim, and note width and height)
• Ceiling height
• Locations of existing plumbing, electrical outlets, switches, and gas lines
• Any soffits, bulkheads, or structural elements
Double-check diagonal measurements (corner to opposite corner). If they don’t match, your room isn’t perfectly square, common in older homes. Note the discrepancy so your design accounts for it.
Measure appliances you plan to keep. Nominal sizes (like “36-inch range”) don’t always match actual dimensions. A 36-inch range might be 35⅞ inches wide, but it needs at least 36 inches of opening. Check manufacturer spec sheets for cutout and clearance requirements.
Transfer measurements into your design tool carefully. Most platforms let you input room dimensions first, then add windows, doors, and fixed elements. Some tools include step-by-step guidance for inputting measurements and avoiding common setup errors.
Choose Your Layout and Workflow
Kitchen layouts follow a few proven patterns. Your space and how you cook determine which one works.
The work triangle (sink, range, refrigerator) is the classic standard. Sides should total 12 to 26 feet, shorter feels cramped, longer means too much walking. This rule matters most in single-cook kitchens.
Common layouts:
• Galley – Two parallel walls. Efficient for small spaces, but can bottleneck with multiple cooks. Keep aisle width at 42 to 48 inches.
• L-shaped – Two perpendicular walls. Flexible and works in most spaces. Leaves room for a table or island.
• U-shaped – Three walls of cabinets. Maximizes storage and counter space, but can feel closed in. Needs at least 8 feet between opposite walls.
• Island or peninsula – Adds workspace and seating. Islands need 42 to 48 inches of clearance on all sides for traffic flow. If you’re adding seating, allow 24 inches of width per person and 15 inches of knee space under the overhang.
Place the sink first, it’s tied to plumbing and usually under a window. Moving drain lines is possible but adds cost and may require a permit. Ranges need proper venting: if you’re switching from electric to gas or relocating the range, budget for electrical or gas line work and consult local code (most jurisdictions follow IRC and NEC standards for appliance installation).
Dishwashers go within 36 inches of the sink to simplify plumbing. Refrigerators should be accessible without crossing the main work zone, place them at the end of a run, not in the middle where they disrupt workflow.
Select Cabinets, Countertops, and Finishes
Once layout is set, start specifying materials. Most design tools include libraries of cabinet styles, but understanding construction matters.
Cabinet types:
• Stock cabinets – Pre-manufactured in standard sizes (increments of 3 inches). Cheapest option, available at big-box stores. Limited finish and size options.
• Semi-custom – More size, finish, and feature choices. Lead times of 4 to 8 weeks. Mid-range pricing.
• Custom – Built to your exact specs. Most expensive, longest lead time (8+ weeks), but fits any space perfectly.
Base cabinets are typically 24 inches deep and 34½ inches tall (36 inches with countertop). Wall cabinets run 12 inches deep and vary in height, 30, 36, or 42 inches are common. Measure your ceiling height and decide if you want cabinets to the ceiling (maximizes storage, modern look) or a gap (traditional, but collects dust).
Countertop material affects the design tool’s visuals and your budget:
• Laminate – $10 to $40/sq ft installed. Affordable, tons of patterns, but seams are visible and edges chip.
• Quartz – $50 to $150/sq ft. Engineered stone, consistent appearance, low maintenance. Heavy, ensure cabinets are sturdy.
• Granite – $40 to $200/sq ft. Natural stone, each slab unique. Needs periodic sealing.
• Butcher block – $30 to $100/sq ft. Warm look, needs regular oiling, not ideal near sinks without proper sealing.
Many kitchen design communities on The Kitchn share real-world photos and material comparisons that help visualize how finishes look in completed projects.
Add backsplash in your design tool, standard height is 18 inches, but full-height (to the bottom of wall cabinets) is popular now. Tile size affects grout line visibility and installation time.
Test multiple finish combinations. White cabinets with dark counters is safe but overdone. Try navy lowers with light uppers, or wood-tone cabinets with white quartz. Your design tool makes experimenting free.
Common Mistakes to Avoid When Designing Your Kitchen Online
Even with great software, it’s easy to design a kitchen that looks good on-screen but fails in real life.
Ignoring code and clearances. Online tools don’t always flag code violations. Ranges need 30 inches of clearance to combustibles on each side unless you install a heat shield. Electrical outlets are required every 4 feet along countertops per NEC. If your design moves the range or sink, you may need permits, check with your local building department before ordering materials.
Underestimating lighting. Most design tools let you add lights, but many users skip this step. Kitchens need layered lighting: ambient (ceiling fixtures or recessed cans), task (under-cabinet strips for counters), and accent (pendants over islands). Plan for at least one light per 4 to 6 feet of counter.
Skipping the mockup. Before finalizing, print your floor plan at scale (many tools export PDFs) and tape it out on your actual floor. Walk through your workflow. Can you open the fridge and dishwasher at the same time? Is there landing space next to the microwave? This catches issues software misses.
Forgetting about toe kicks and fillers. Base cabinets need a 3- to 4-inch toe kick recess so you can stand close to the counter. Fillers (thin strips of matching material) are often needed where cabinets meet walls or appliances to ensure doors and drawers open fully. Budget a few inches for these, they’re easy to overlook digitally.
Choosing trendy over functional. Open shelving photographs beautifully, but most cooks find it impractical (dust, visual clutter). Deep drawers beat lower cabinets with shelves for pot storage. Lazy Susans waste corner space, pull-out shelves are better. Design tools make it easy to add features: think hard about whether you’ll actually use them.
Not accounting for material lead times. Custom countertops can take 4 to 6 weeks after template. Semi-custom cabinets may be backordered. Order early and have a contingency plan if your first-choice material isn’t available.
Taking advantage of interior design trends tools can help balance current styles with timeless functionality, ensuring your kitchen doesn’t look dated in five years.
Finally, be realistic about DIY limits. Designing online is one thing: execution is another. Installing cabinets requires level walls, a helper, and familiarity with shims and scribing. Countertop templating is best left to pros, one bad measurement means a ruined slab. Plumbing and electrical often require permits and should be handled by licensed tradespeople unless you have experience and local codes allow homeowner work.
A good online design sets you up for success, but knowing when to call in help keeps the project on track and up to code.