
Table of Contents
ToggleDesigning a kitchen in a tight footprint isn’t about compromise, it’s about precision. When square footage is limited, every cabinet, counter inch, and lighting choice carries weight. A poorly planned small kitchen feels claustrophobic and frustrating. A well-designed one? It operates like a Swiss watch, delivering full functionality without wasted motion or clutter. Whether tackling a galley kitchen in an older home or carving out cooking space in a studio apartment, the strategies below turn spatial constraints into smart design opportunities.
Key Takeaways
- Smart kitchen design for small spaces prioritizes efficient workflow by organizing the work triangle (sink, stove, refrigerator) within 15 feet and zoning tools by task rather than attempting visual illusions.
- Three proven layout strategies—galley, L-shape, and single-wall—each offer distinct advantages; choose based on your footprint and whether multiple cooks share the space.
- Maximize vertical storage by installing floor-to-ceiling cabinets, using blind corner pull-outs, and adding toe-kick drawers to reclaim otherwise wasted space.
- Light colors, reflective surfaces, and strategic layered lighting (under-cabinet LEDs, recessed cans, and pendants) visually expand the space while eliminating shadows and clutter.
- Invest in multi-functional appliances and movable furniture—like microwave-convection combos, 18-inch dishwasher drawers, and rolling carts—to maximize flexibility and function without consuming floor space.
- Quick DIY upgrades such as cabinet painting, peel-and-stick backsplash, hardware replacement, and under-cabinet LED strips deliver significant visual and functional improvements for under $200.
Why Smart Kitchen Design Matters in Compact Spaces
Small kitchens amplify mistakes. A cabinet door that swings into the fridge becomes a daily annoyance. Inadequate counter space means prep work spills onto the dining table. Poor lighting turns meal prep into guesswork.
The National Kitchen & Bath Association recommends a work triangle (sink, stove, refrigerator) with legs totaling 12–26 feet. In compact kitchens, that triangle often shrinks to under 15 feet, making efficient layout critical. Every wasted inch multiplies into lost storage, workflow bottlenecks, or visual clutter.
Good design in small spaces prioritizes zoning, grouping tools, ingredients, and appliances by task. It means selecting slim-profile appliances (18-inch dishwashers, 24-inch ranges) that meet needs without hogging floor space. It also means confronting load-bearing walls and plumbing stacks early in planning: moving a sink or stove often requires permits and licensed work, not just elbow grease.
Compact kitchens also test ventilation requirements. The International Residential Code (IRC) mandates adequate exhaust for gas ranges. In tight spaces, a recirculating range hood may not meet code, check local jurisdiction before committing to an island cooktop or wall-mounted unit.
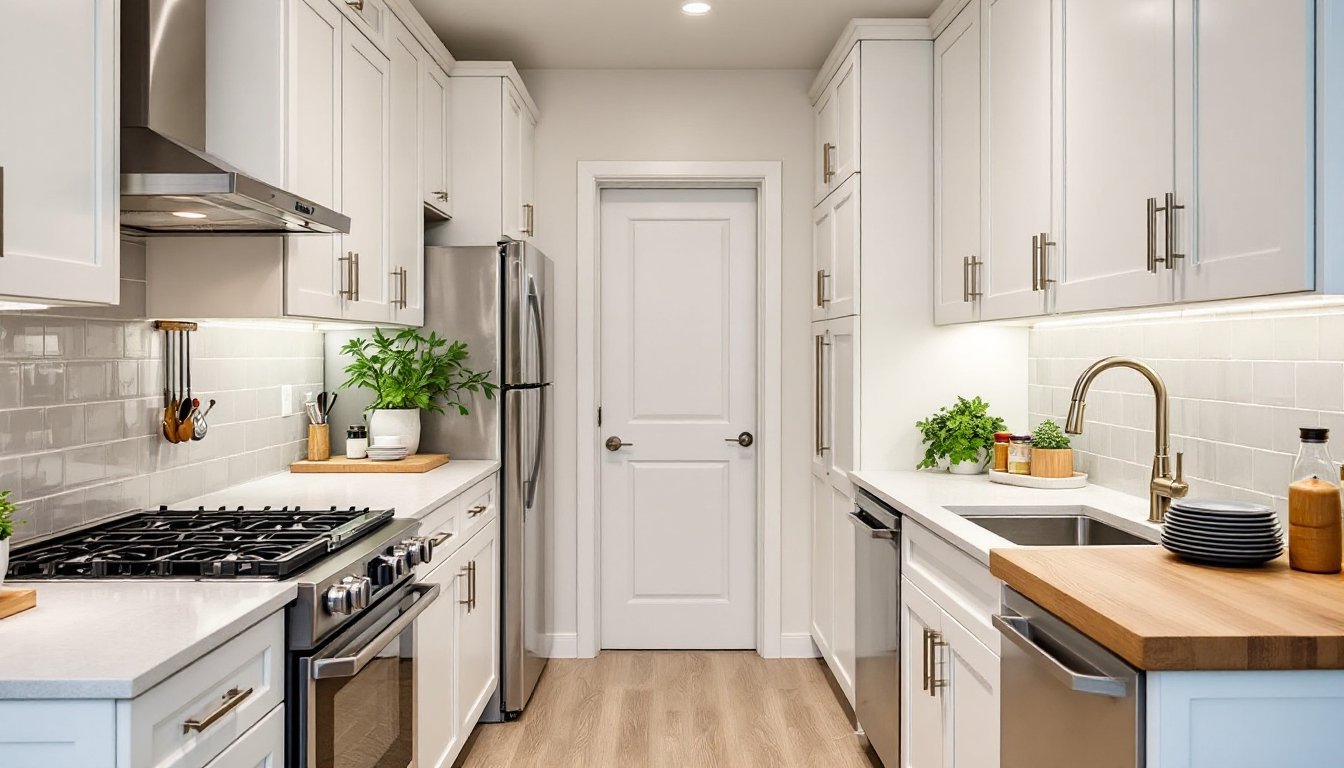
Layout Strategies That Make Small Kitchens Feel Bigger
Layout drives everything. The three workhorse configurations for small kitchens are galley, L-shape, and single-wall.
Galley kitchens place counters and appliances along two parallel walls, typically 36–48 inches apart. This layout delivers maximum counter and cabinet space in narrow footprints. Keep the aisle width at 42–48 inches if two cooks share the space: 36 inches works for solo use. Avoid placing the fridge at the end of a galley, it creates a dead end.
L-shape layouts anchor two adjacent walls, leaving one or two sides open. This works well in combined kitchen-dining areas, as the open side integrates with living space. Use the corner for a lazy Susan cabinet or a diagonal sink to avoid the “corner cabinet black hole” where items disappear.
Single-wall kitchens line everything up on one wall, common in studios and basement kitchenettes. The challenge: limited counter space. Counter depth becomes critical: if building codes and structural constraints allow, consider extending upper cabinets to 15 inches deep (vs. standard 12 inches) and undercounter units to 27 inches (vs. 24 inches). Gain three inches of workspace without encroaching on floor space.
Avoid islands in kitchens under 100 square feet unless they’re mobile. A fixed island needs 36–42 inches of clearance on all working sides. In tight quarters, a rolling cart with butcher block top and shelving delivers flexible prep space without blocking traffic. Many small-space enthusiasts swear by compact kitchen solutions that balance function with visual openness.
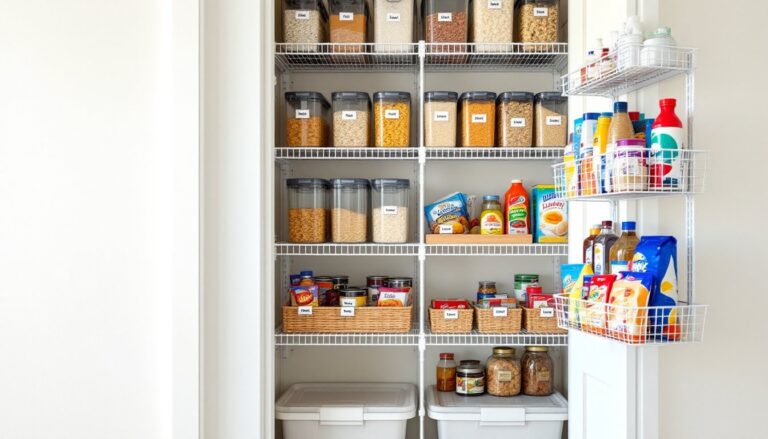
Storage Solutions to Maximize Vertical and Hidden Space
Small kitchens demand vertical thinking. Floor-to-ceiling cabinets capture dead space above standard 30-inch uppers. Even if top shelves require a step stool, they’re ideal for seasonal items, bulk pantry goods, or seldom-used serving ware.
Open shelving works if discipline follows. Floating shelves (mounted on concealed brackets rated for 50+ lbs) keep everyday dishes and glassware accessible while creating visual depth. Limit open shelving to one wall: more than that and the kitchen feels cluttered. Use 3/4-inch plywood or solid hardwood, not particleboard, for strength.
Drawer organizers and pull-outs make base cabinets functional. Standard drawers waste vertical space: tiered inserts and adjustable dividers corral utensils, spices, and lids. Blind corner pull-outs (brands like Rev-A-Shelf offer DIY-friendly kits) retrieve items from deep corners without crawling on hands and knees.
Toe-kick drawers (3–4 inches tall, tucked under base cabinets) hold baking sheets, cutting boards, or shallow pans. Retrofitting these requires removing the existing toe kick and adding slides, doable with a drill, level, and patience.
Magnetic strips mounted on backsplash or inside cabinet doors hold knives, metal spice tins, or tools. Pegboard inside cabinet doors organizes lids and measuring cups. Small kitchens that embrace smart interior design principles often use every surface, visible or hidden, as potential storage.
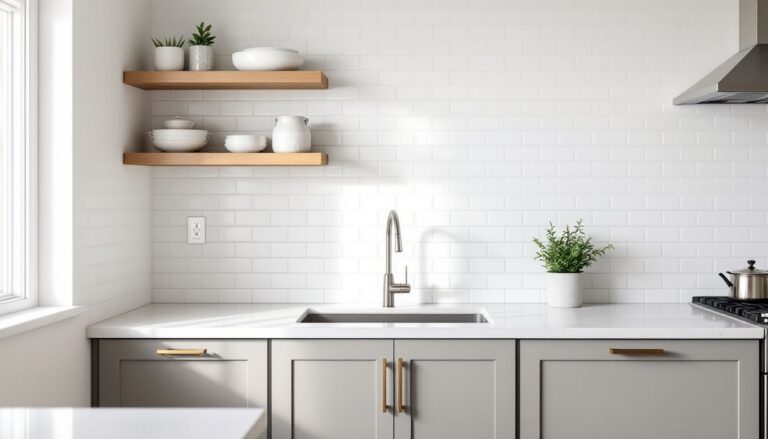
Color, Lighting, and Material Choices for Visual Expansion
Light colors and reflective surfaces push walls outward visually. White or light gray cabinets paired with pale countertops (quartz, laminate, or butcher block) maximize natural light reflection. Matte finishes feel modern, but semi-gloss paint on cabinets bounces more light, choose based on desired aesthetic.
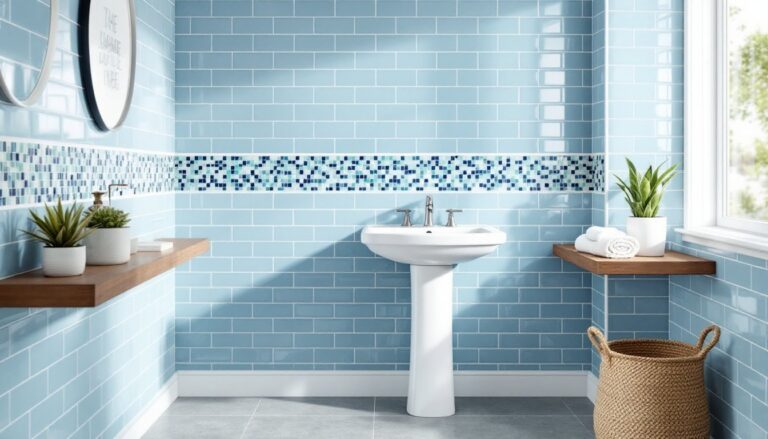
Backsplash continuity matters. Running the same tile or material from counter to upper cabinets eliminates visual breaks. Large-format tiles (12×24 inches or bigger) with minimal grout lines read as cleaner and more expansive than small mosaics. Subway tile works, but consider stacking it vertically to draw the eye upward.
Lighting layers are non-negotiable. A single ceiling fixture leaves corners dark and makes the space feel smaller. Install under-cabinet LED strips (plug-in or hardwired) to eliminate counter shadows, this is a 30-minute DIY with adhesive-backed strips and a transformer. Add recessed cans or a flush-mount ceiling fixture rated for kitchens (damp-rated if near sinks). If the budget allows, a pendant over a small dining nook or peninsula adds visual interest without consuming space.
Consider glass-front cabinet doors on uppers. They create depth and showcase dishware, but demand tidiness inside. Frosted or seeded glass hides clutter while still reflecting light. For DIYers comfortable with a router, swapping solid doors for glass inserts is a weekend project: just wear safety goggles and a dust mask when cutting.
Many homeowners exploring current design directions find that light, neutral palettes with strategic pops of color, via dish towels, bar stools, or a painted accent wall, keep small kitchens from feeling sterile.
Multi-Functional Furniture and Appliances for Space Efficiency
Compact kitchens benefit from gear that does double duty. Microwave-convection combos replace both a microwave and a second oven, freeing up counter or cabinet space. Brands like Panasonic and Breville make countertop units under 20 inches wide.
Dishwasher drawers (18-inch models from Fisher & Paykel or KitchenAid) fit where full-size units won’t. They’re pricier per load but justified in tight footprints. Alternatively, a portable countertop dishwasher hooks to the faucet and stores in a pantry when not in use, ideal for renters or budget builds.
Slide-out cutting boards installed above a drawer or mounted under a counter add instant prep space. Use 3/4-inch hardwood (maple, walnut) for durability: finish with food-safe mineral oil. Mount on full-extension slides rated for at least 75 lbs.
Fold-down tables or wall-mounted drop-leaf counters serve as dining spots or extra prep surface. IKEA’s NORBERG and similar designs mount to studs with heavy-duty brackets. When folded, they project only 4–6 inches from the wall. Pair with fold-away stools.
Cart-based storage keeps flexibility high. A rolling cart with butcher block top, shelves, and hooks can serve as a mobile prep station, bar cart, or extra pantry. Look for locking casters to prevent drift during use. Showcasing practical space-saving ideas often includes movable furniture that adapts as needs change.
Budget-Friendly DIY Tips for Small Kitchen Upgrades
Not every improvement requires a full remodel. Start with paint. Refreshing cabinets with bonding primer (like INSL-X or Benjamin Moore Stix) and semi-gloss latex topcoat transforms a kitchen for under $150 in materials. Clean surfaces with TSP substitute, sand lightly (120-grit), prime, then apply two topcoats. Remove doors and work in a ventilated area: wear a respirator if using oil-based products.
Peel-and-stick backsplash tiles (vinyl or composite) install in an afternoon with a utility knife, level, and patience. Quality brands (Smart Tiles, Tic Tac Tiles) stick to drywall or existing tile. They won’t fool a trained eye, but they’re removable, ideal for renters.
Replace cabinet hardware. Swapping dated knobs and pulls for modern bar pulls or cup pulls costs $2–8 per piece and updates the look instantly. Drill new holes carefully with a template: a wrong hole is permanent. Use a backing board behind the drill point to prevent tear-out.
Add open shelving with simple brackets and boards. Heavy-duty floating shelf brackets (rated 75–100 lbs per pair) mount to studs with lag screws. Cut boards to length with a circular saw, sand edges (80 then 120-grit), and finish with polyurethane or paint. Cost: $30–60 per shelf.
Install under-cabinet lighting. Battery-powered LED pucks work, but plug-in strips offer better longevity. Route cables through the back of cabinets or use cord covers. This upgrade improves function and ambiance for under $50.
For those interested in broader home makeovers, exploring trending design strategies can inform choices beyond the kitchen. Real-world inspiration from sources like curated small kitchen projects and budget-friendly home tours often sparks ideas that fit personal style and skill level.
Conclusion
Small kitchens reward intentionality. Every layout choice, storage hack, and finish selection either maximizes or wastes precious space. Focus on workflow first, aesthetics second. Use vertical space aggressively, layer lighting thoughtfully, and choose multi-functional pieces over single-task gear. The goal isn’t to make a small kitchen look big, it’s to make it work efficiently. Done right, a compact kitchen outperforms a poorly planned large one every time.